Setup: Facebook Messenger Integration
QualifiedChat can integrate directly with Facebook via Facebook Messenger. Visitors to your Facebook business page or news feed advertising can now chat with our live agents 24/7, instead of you having to monitor your Facebook messages. Once the visitor has initiated a Messenger chat with our agents, it is handled as a normal lead.
Please Note: This information is only relevant for existing QualifiedChat clients; please contact Facebook support if you have questions regarding your specific requirements.
Requirements:
To setup the integration, you will need to have administrator access to your Facebook business page. You will also need a QualifiedChat provided Callback URL and Verification Token. Please contact your QualifiedChat representative for this information prior to beginning the steps below.
Finally, Facebook requires applications created with the developer tools to have a 1024 x 1024 pixel icon in a transparent PNG format. You can create your own, or download our generic QualifiedChat icon. They also require your website to have a Privacy Policy, which they will review as part of the submission process. You can read further information on what Facebook expects in your policy.
Difficulty Level:
Advanced/Developer
If you manage the marketing for your Facebook business page, you may wish to get your web developer to complete these steps.
Step 1:
Log into the Facebook account that has administrator access to your business page.
Visit https://developers.facebook.com and click Create App. (If you have previously created an app, click Add a New App from My Apps instead).
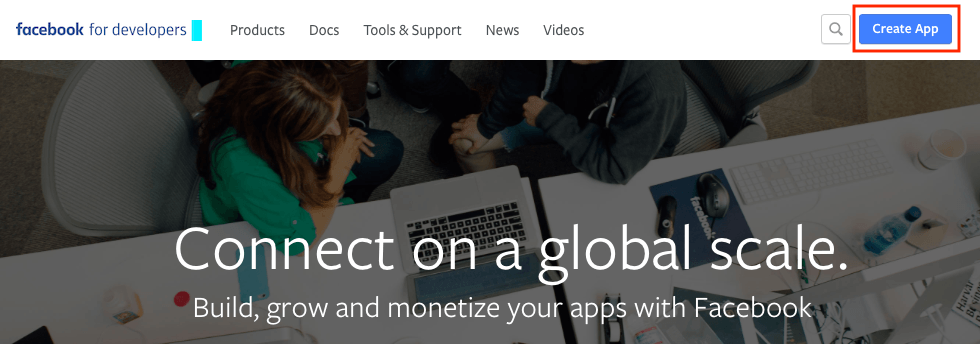
In the Create a New App ID box that appears, enter a Display Name and a valid Contact Email address. Use a descriptive name for the display name, such as your Company Name + Chat. Click Create App ID.
Step 2:
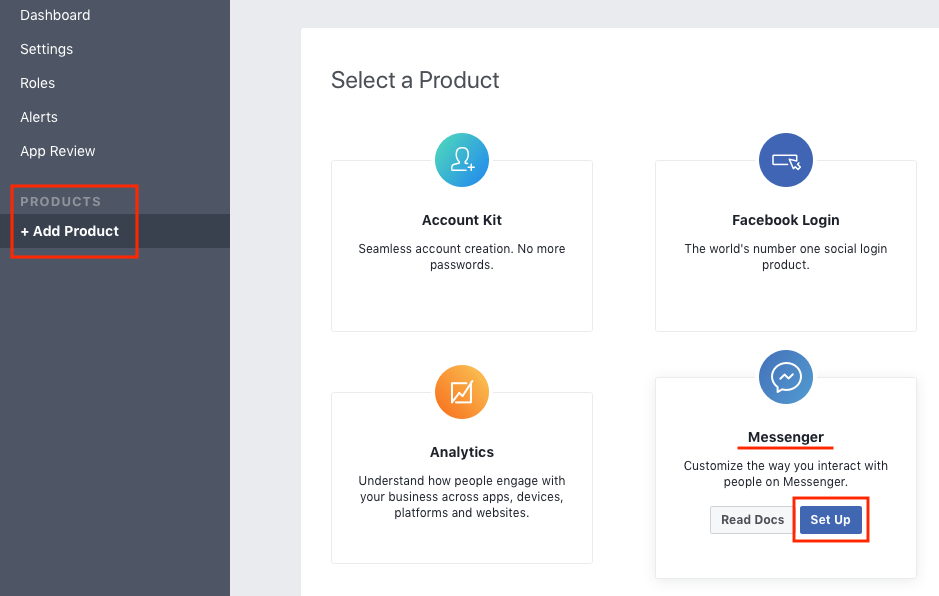
From the sidebar, click Add Product and under Messenger, click Set Up.
Step 3:
From the sidebar, click Messenger, then click Setup Webhooks in the main content area.

Step 4:
In the Create a New Page Subscription box that appears, enter the Callback URL and Verify Token provided by QualifiedChat. Enable the Subscription Fields check boxes that are shown below, then click Verify and Save.
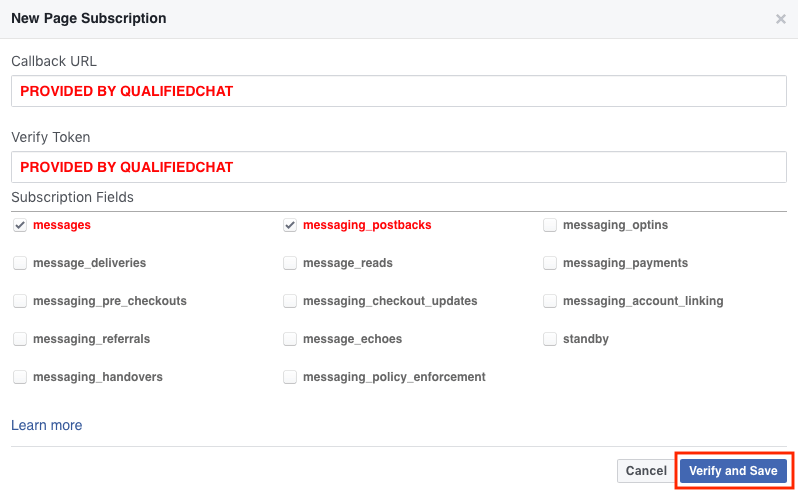
If any error messages appear after clicking Verify and Save, please contact us at [email protected] for review.
If the verification is successful, the box will close. You will see the Complete checkmark in the Webhooks section. After seeing this, click Select a Page and choose your business page, followed by clicking on Subscribe. If this opens a new window asking for verification, click Continue as [YourName].

Step 5:
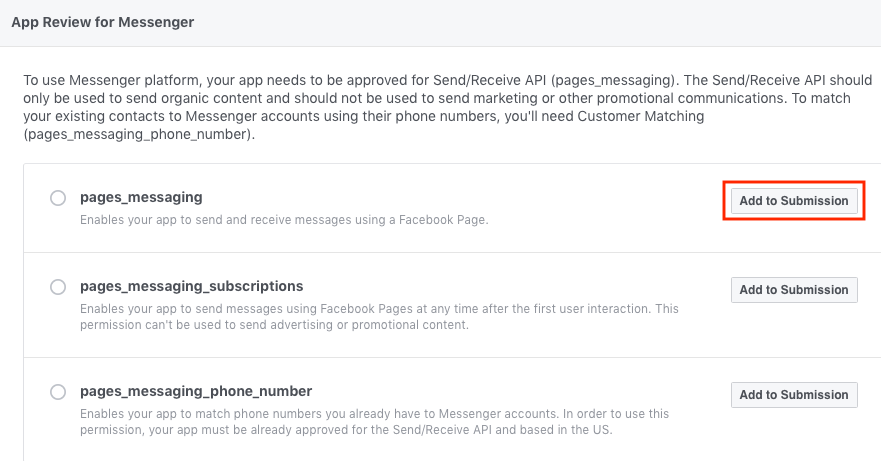
To enable chat integration for your visitors, Facebook requires an app approval process, which can take up to 5 days to be reviewed.
In the App Review for Messenger section, Click the Add to Submission button for the pages_messaging entry.
Step 6:
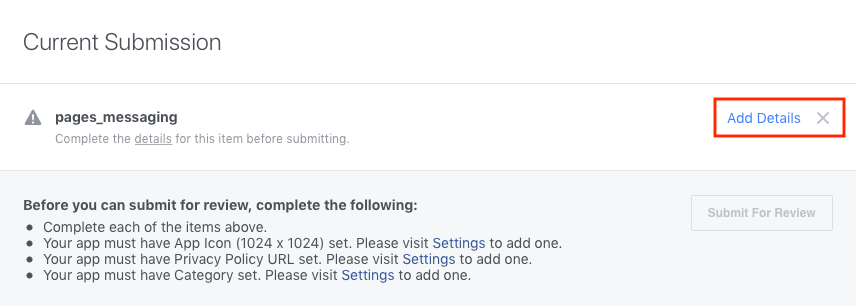
This will create a Current Submission section. Click Add Details in this section.
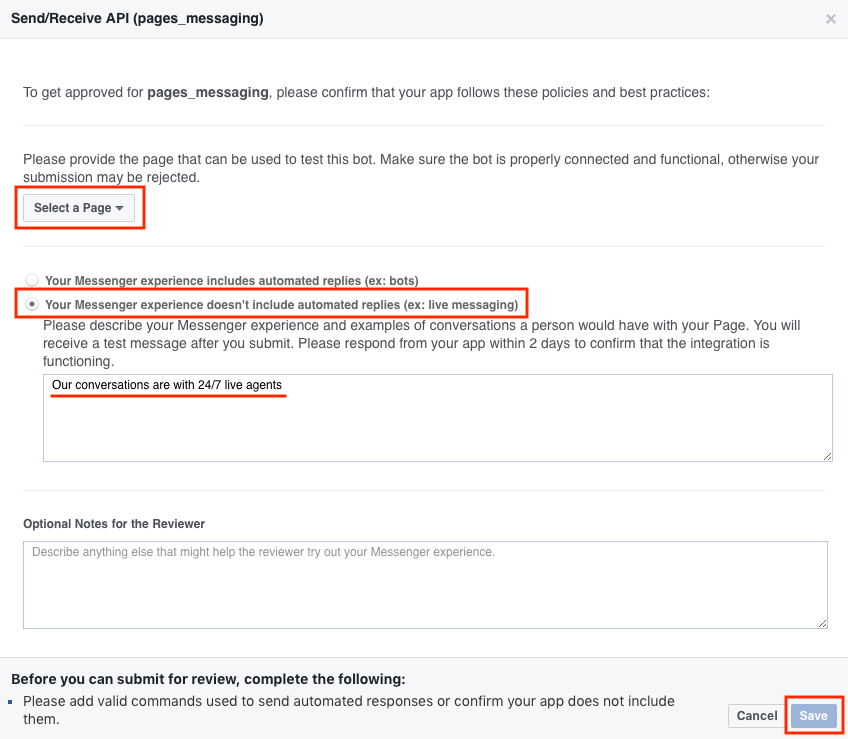
This will open the Send/Receive API (pages_messaging) box. Click Select a Page and choose the business page to integrate. Select Your Messenger experience doesn’t include automated replies and fill the section with something like the text shown in the screenshot: Our conversations are with 24/7 live agents. Click Save.
Step 7:
After clicking Save, click Settings, and provide the following items as discussed under the Requirements heading above:
- The Privacy Policy page URL from your website
- The 1024 x 1024 app logo
After adding these items, under the Current Submission section click Submit for Review. The review and approval process can take up to 5 days.

Step 8:
A successful submission will trigger a message in your business page’s inbox from Facebook that says:
This is a test message from the Facebook team. Please respond from your app within 2 days to confirm that the integration is functioning.
Make sure you reply to the message within 2 days.
On approval, your Facebook profile will get a notification. You can verify this in the developers app dashboard as shown below.

Step 9:
Once you have approval from Facebook, visit developers.facebook.com and select your new app. From the sidebar, choose Messenger > Settings and under the Token Generation section, click Select a Page and choose the business page you integrated.
IMPORTANT: This will generate a Page Access Token. Please copy this token and email it to your QualifiedChat representative.

Step 10:
Go to App Review and make your app public.

Step 11:
Finally, you will need to edit your business page settings to make QualifiedChat the default chat agent when a visitor sends you a message.
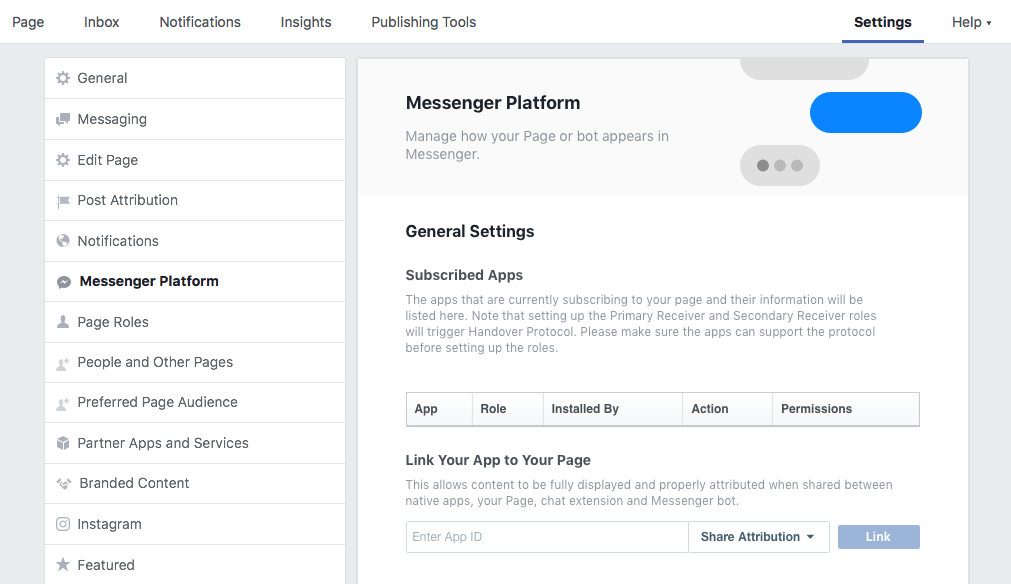
Go to your business page. Click Settings then Messenger Platform from the sidebar. In the Link Your App to Your Page section, enter the App ID from developers.facebook.com for your app. After clicking Link, change the Role to Primary Receiver. This will allow our 24/7 live agents to be the primary contact visitors that engage with you via Facebook Messenger.
